Reviews by pat
Opensource ad blocker for Android that filters all outbound requests for ads and tracking using any combination of premade lists, whitelist and blacklist. You can also switch dns providers by selecting from a list or adding one. UI is simple and effective.
Blokada works by using Android’s vpn feature to route all outbound requests through it. This allows it to filter all requests that come from the device.
Long Term Update
After 6 months of usage, the only issue that came up is occasional issues with program staying alive. The app silently died so I didn’t notice for a while. Turning on the Keep alive option under advanced settings seems to fix the issue. This puts up an always on notification to keep Blokada alive. This means you’ll have 2 notifications up almost all the time for this app.
Verdict
This is a must have app for Android
Desktop thermal transfer printer with UPS Worldship support. These things are reliable, printed several labels a week for a few years after buying it used. Thermal transfer device can get dust on it and need to be wiped off occasionally.
Linux
2020 Update: CUPS has updated and the options below are no longer necessary. Simply setup with EPL2 driver and go.
Old info:
Linux support is frustating but completely fixable. The printer will print out of the box with Zebra ZPL print driver. The prints will look poor and barcodes will be terrible and likely unreadable. The fix is to use the CenterOfPixel option when printing :
lpr -P printer -o CenterOfPixel pathtofile.
Prints will look just like they do on Windows. You can add this option as default in the .ppd file in /etc/cups/ppd for this printer by adding
*OpenUI *CenterOfPixel/Center Of Pixel: PickOne
*OrderDependency: 20 AnySetup *CenterOfPixel
*DefaultCenterOfPixel: true
*CenterOfPixel true/true: “”
*CenterOfPixel false/false: “”
*CloseUI: *CenterOfPixel
to the .ppd file.
/oldinfo
UPS
Printing UPS labels from a browser using UPS Thermal Printing Script requires the printer is setup with a raw queue. When adding the printer, click on generic driver then raw. Print normally and the script will take care of the rest. Label prints perfectly.
Verdict
Printer is dead reliable, supported by Linux
Monoprice Maker Select V2 is a near direct copy of a Wanhao Duplicator i3. This printer optimizes the i3 design for mass production using steel sections for the frame and electronic housing. Notable for coming nearly assembled and the low price(269.99 as of 11/2018).
Assembly
Involves screwing the steel upright to the x axis and running some cables, quite easy.
Components
The steel frame is quite sturdy, better than Original Prusas on the Z axis. Bed works well at first, but you’ll find the adhesive surface on top wears out rather quickly and entire bed assembly is poorly designed. Spoolholder is basic and too small for spools from Monoprice.
Printing
Tested with Monoprice PLA, printing went well at first with suprisingly good print quality. Over time, printing becomes more frustrating. The bed surface will need to changed frequently if printing regularly. The bed has become less true forcing me to use rafts and only use a 2"x2" square in the middle of the bed to get quality parts. Dimensional accuracy in the X and Y axes seemed to suffer scaling issues where it would undershoot dimensions.
Software/Firmware
I used Cura and Repetier to slice and control the printer. I recall everything working fine once setup. I had to pull printing profiles from the gcode on the sd card that came with the printer. The printer size and connection details had to be filled in to the host software. Acceleration/jerk limits were terrible, the frame would develop z wobble sometimes even though the frame is overbuilt to the point this shouldn’t be an issue.
Tweaks
There are many suggested fixes included for the common bed leveling issue. Locknuts for the thumbscrews, sturdier x axis carrier and replacing the bed with a PEI build surface. Also, a I’ve seen a MOSFET mod recommended as there’s reports the bed heater can overload a connector and possibly start a fire. Reportedly, implementing these fixes will make this a good printer.
Verdict
This is a decent printer for playing with 3D printing at a low price. If you want it to be a reliable machine, you’ll need to tweak many things to get there.
Spool created by Slant 3D to optimize the masterspool idea of a 2 piece reusable spool that accepts spoolless filament refills. The Slant Spool’s main change is switching from a threaded locking mechanism to a 1/4 turn mechanism and it works exactly as advertised. The mechanism change also allows both sides to be identical which simplifies printing and upkeep. The solid portion on the outside of the reel is perfect for the filament id sticker that comes with the refills. Lastly, there’s filament sized holes in the outside of the reel to hold the loose end when you’re not using the filament.
Website for 3D printing files made by members of the RepRap project. Website is clean and usable. The selection is much smaller than thingiverse which limits its usefullness.
A large repository of mostly openly licensed files for 3D printing. Instructions for printing the objects or why the objects exist can often be spotty. Be aware that this website is owned by Makerbot who is owned by Stratasys. Uploading or remixing a thing requires a Makerbot account.
Intro
I bought a spool in August since it’s $25 per KG and goes down with the volume you buy to $21 for 4 at a time. Matterhackers also has free shipping to anywhere in the US making this a good deal for PETG. The spool arrived in a vacuum sealed bag with desiccant inside. The first spool printed great with default Prusa PETG settings. Bed ahesion on a PEI printbed is very good if bed is clean. I ordered 2 more 1kg spools in September and have been having constant issues with material accumlating on the nozzle and then detaching leaving blobs and voids on parts. It’s unclear if the issue is with my printer or the material at this point. It’s unlikely I’ll be able to fully troubleshoot the problem in the near future since Matterhackers is out of stock.
Quality
Diameter measured an averaged of 1.73mm diameter taking multiple measurements with calipers on two different spools. This puts it well within the advertised spec of 1.75 ±0.07mm. No visible impurities were seen. Filament fed nicely off spool.
Print Settings
Prusa Generic PETG Settings 230C Extruder/85C Bed 1st layer, 240C/90C Bed after 1st layer
Matterhackers recommended print settings 230-255C Extruder/55-77C Bed
Availability
Matterhackers seems to have issues keeping their build series PETG in stock. This color has been out of stock for a couple of weeks and is estimated to be out of stock for another month.
Verdict
The pricing is good when buying several at a time, product arrives in a timely manner and product quality may be good (assuming the problem is with my printer). The availibilty issues combined with questions on quality leaves me looking for another source for PETG.
Slic3r is an open source slicing program with the features you’d expect. The Prusa edition adds in some integration with Prusa printers to make program setup a bit easier.
UI
UI is pretty and works well for common tasks. There are some menus and advanced features that are inscrutable until you go through the documentation. You have to manually keep track of which tab you are in. Parts only show up in 3D and 2D tabs until they have been sliced, then you can see more in preview and layers tabs. Settings are nicely laid out across 3 tabs at the top.
Slicing
Everything works quickly and as expected.
Verdict
Good piece of software made better with printer integration. Easy things are easy and hard things are possible(once you read the docs).
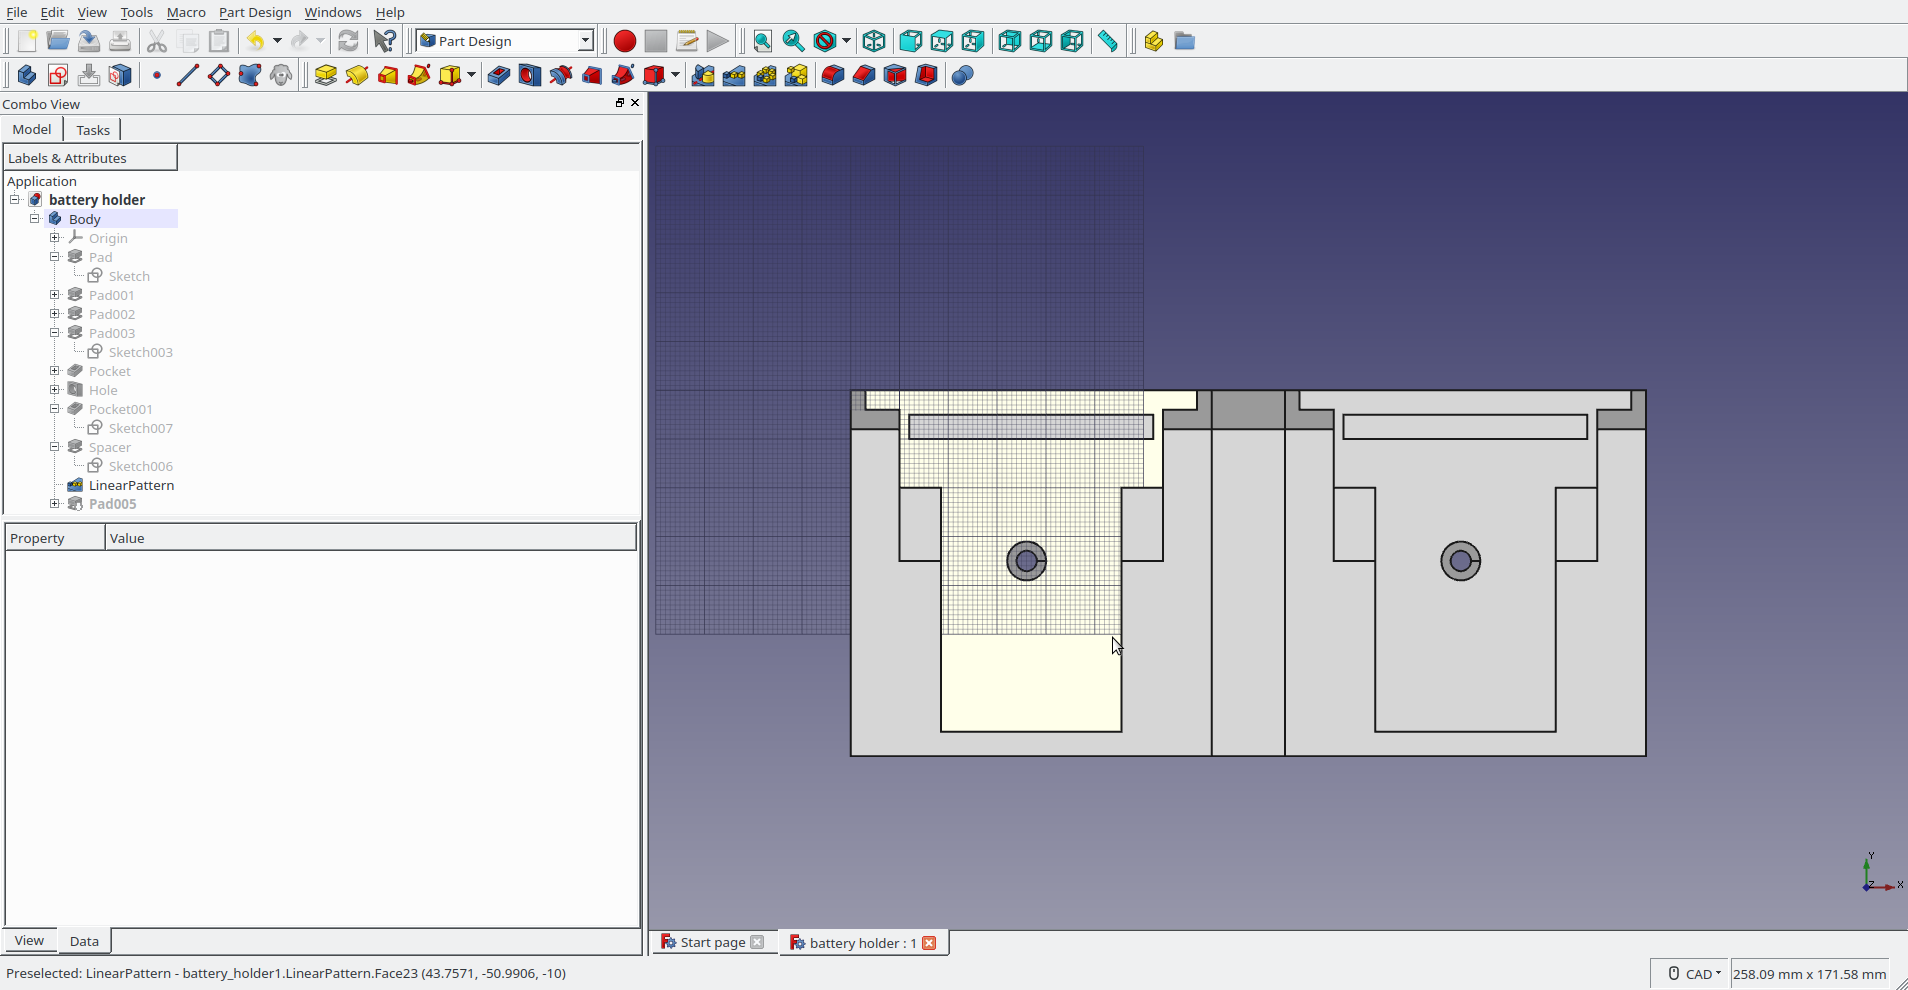
FreeCAD is a FOSS 3D parametric modeler that runs on Linux, Mac and Windows. This is a review of version 0.17.
Features
Parametric modeling
Parametric modeling is the killer feature here. It allows you to link dimensions so they autoupdate when the parent changes. This is early software and it shows. Sketches mapped to faces will map themselves to a different plane when editing a feature above the sketch in the feature tree. You can also link dimensions by naming a dimension and then referencing it by name when creating another constraint: Sketch.constraints.name. This part is well thought out and easy to use. Datum features are new in this version and need work. I’ve spent several hours fighting to get the datum planes defined correctly even when doing simple things like creating a copy of the xy plane but higher on the z axis. That being said, once a part is modeled with datum planes and dimensions are controlled with named constraints, everything works well.
Sketcher
Sketcher is on par with commercial programs for the most part. I’ve had issues with auto constraints not always being applied which will cause issues when you try to base a feature on the sketch. The solver has issues that will lead you to overconstrain sketches if you follow its guidance. Fixes for this are already in the 0.18 branch.
UI
Straight forward and relatively easy to use. It’s interface is similar to many other CAD programs with toolbars for commands and a feature tree for the part. The property view panel is a great addition that allows you to see all the properties of feature or sketch and edit them. The UI is confusing when multiple parts are open in seperate tabs because the feature tree keeps both parts in the same pane and doesn’t change focus when you switch tabs. This leads to many unintended edits on the part you can no longer see.

FreeCAD 0.17 (Own work. License: CC-BY-SA.)
Verdict
Software is usable now with quirks that come with early development software. The majority of features of a true 3D parametric modeler seem to be in the program but many need work. Assemblies are not yet implemented… The ongoing development should make this software not only usable but competitive with commercial products in a few years.
Assembly
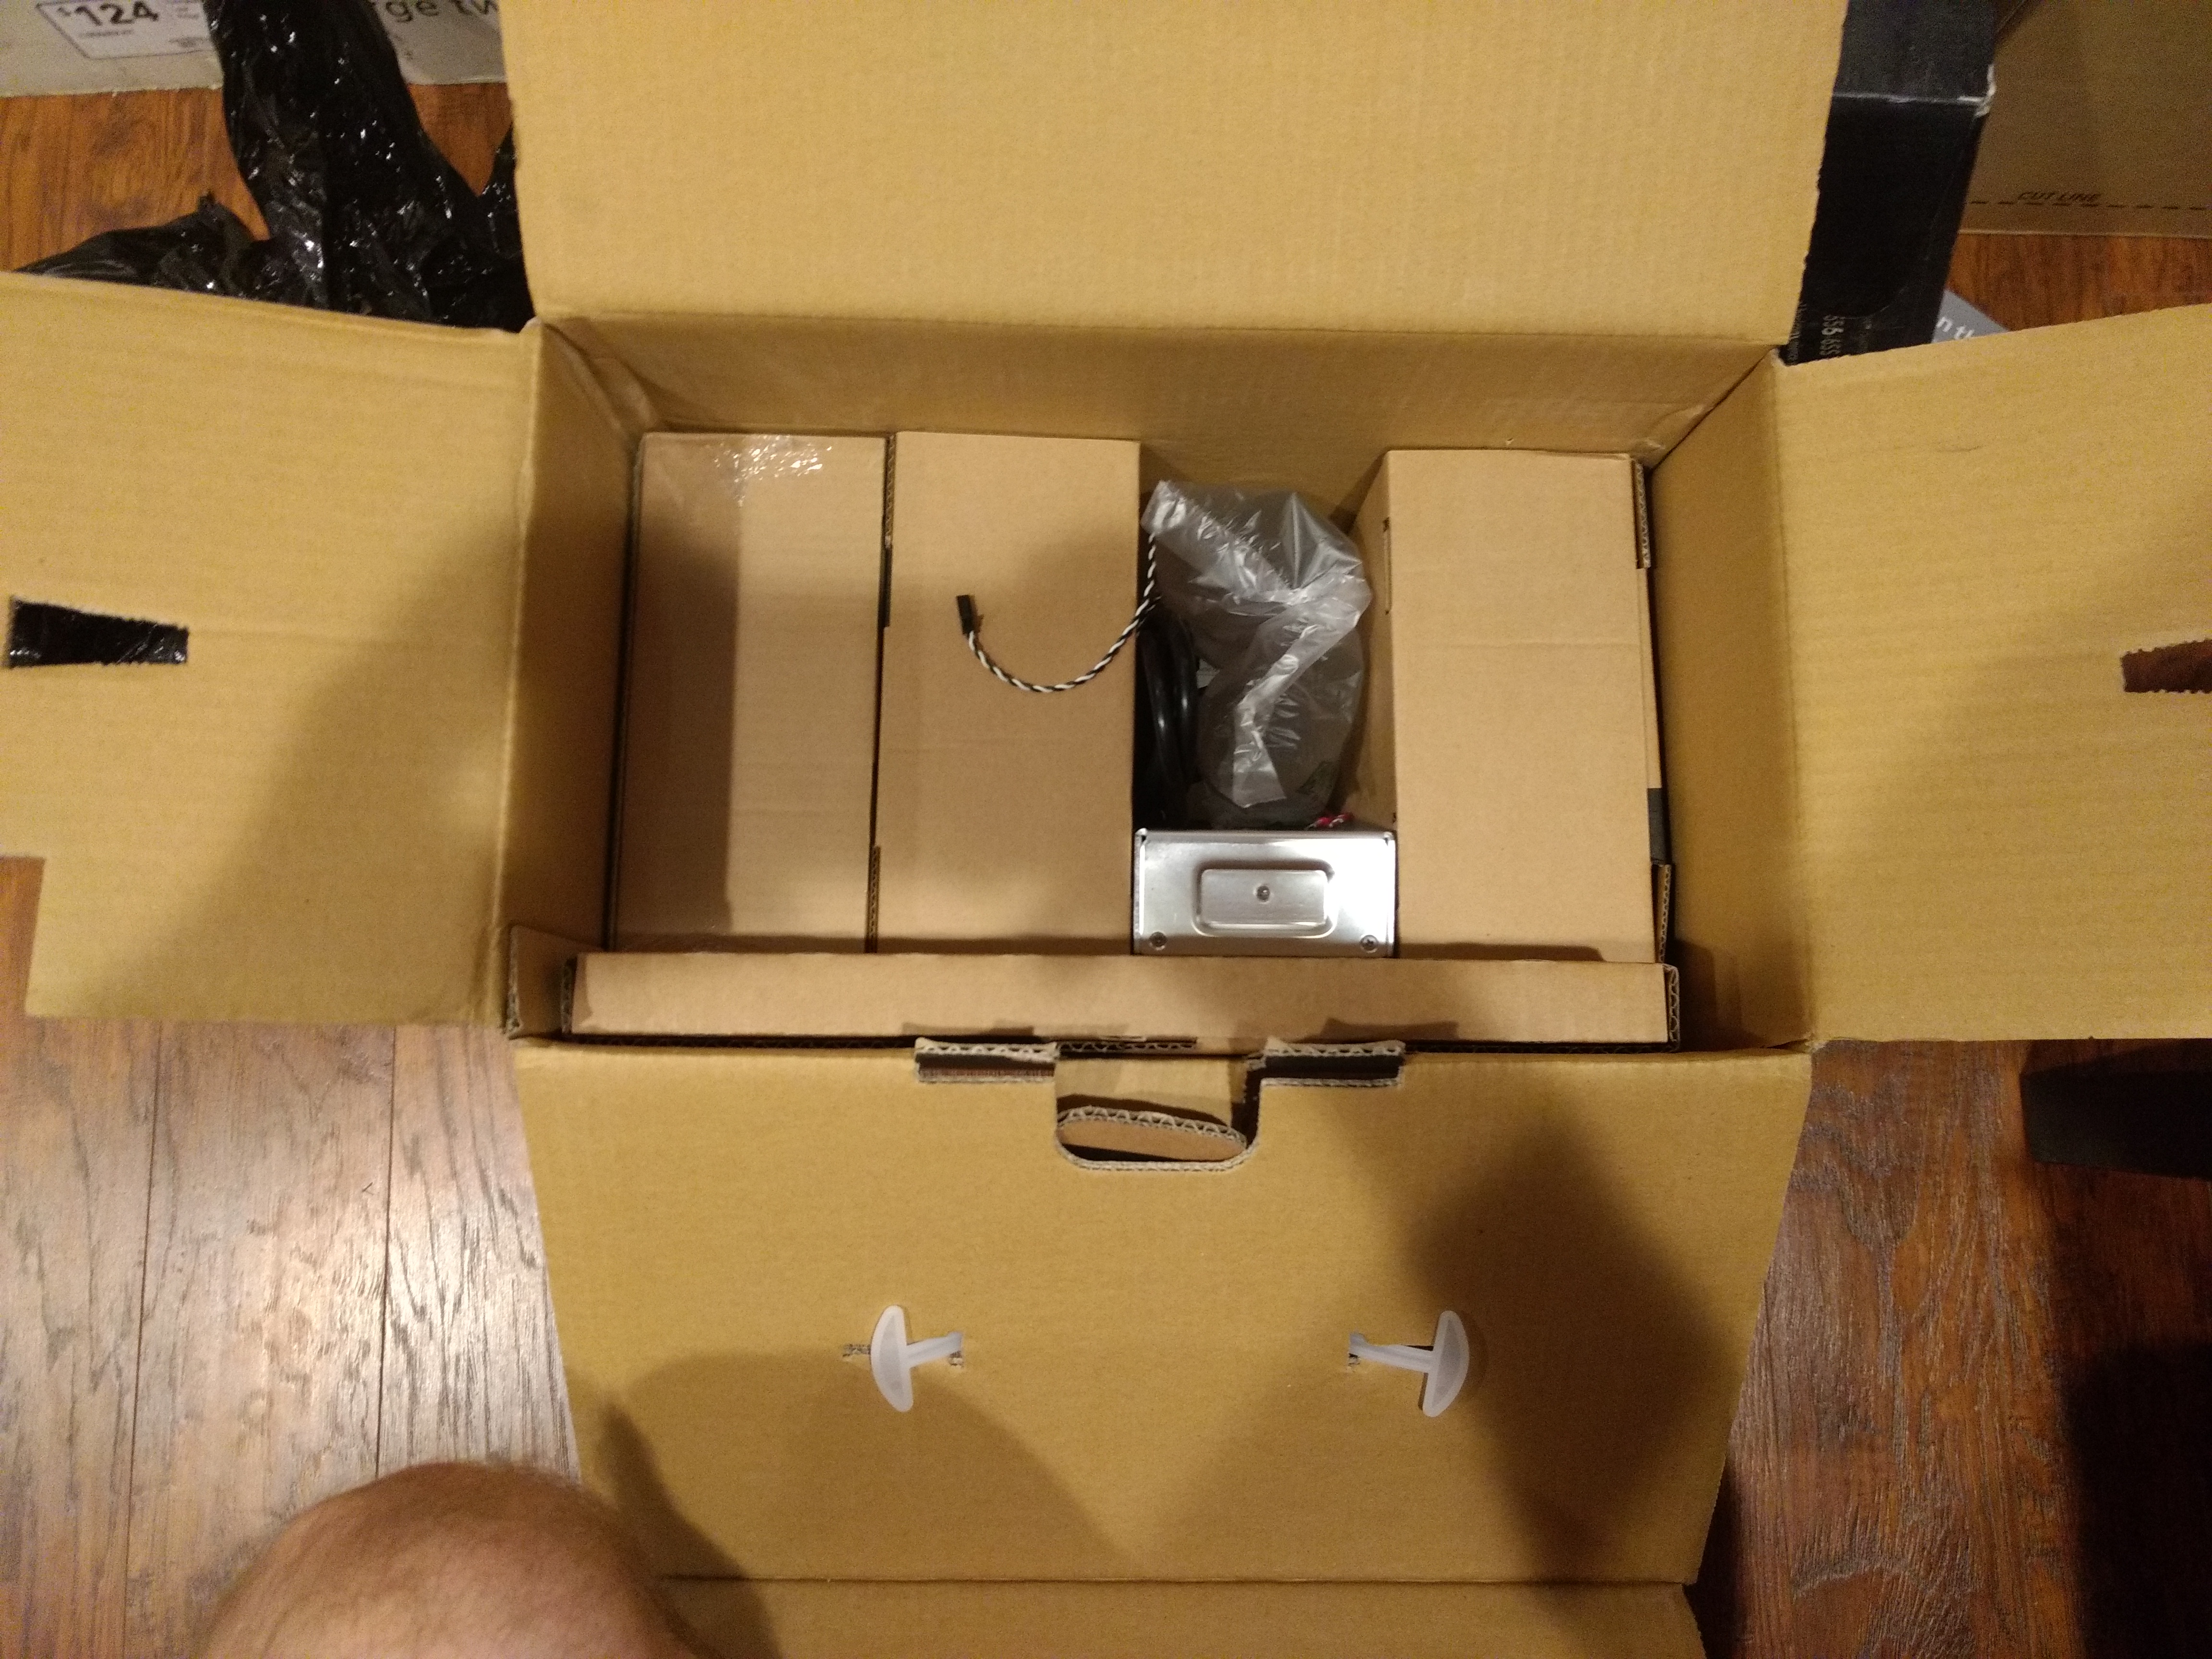
i3 mk3 kit (Own work. License: CC-BY-SA.)
Kit arrives in box with several smaller boxes inside for the sub assemblies. Everything is well organized and labeled. The kit comes with tools for assembly, 1 kg of PLA and gummy bears. Assembly of the kit took around 12 hours and can be tedious. Be prepared to spend much more time than that if you aren’t experienced with this kind of work. Assembly instructions were generally good but, use the online version so you can see comments where people had trouble or the instructions were confusing. The tuning once the printer was assembled takes patience and is a bit unsettling. It has you do a pre-programmed print and adjust the z axis down while printing to calibrate extruder to print bed relation.
The belt tightening on the x axis is bad. Pull as hard as you can or you’ll find the belt is too loose even with the tension adjust and have to take the back off the x carriage again. Be careful, the tension adjustment will crack the mount with no notice! Also, high belt numbers mean loose belt, low numbers mean tight belt so if you’re above 280 go back and tighten your belts.
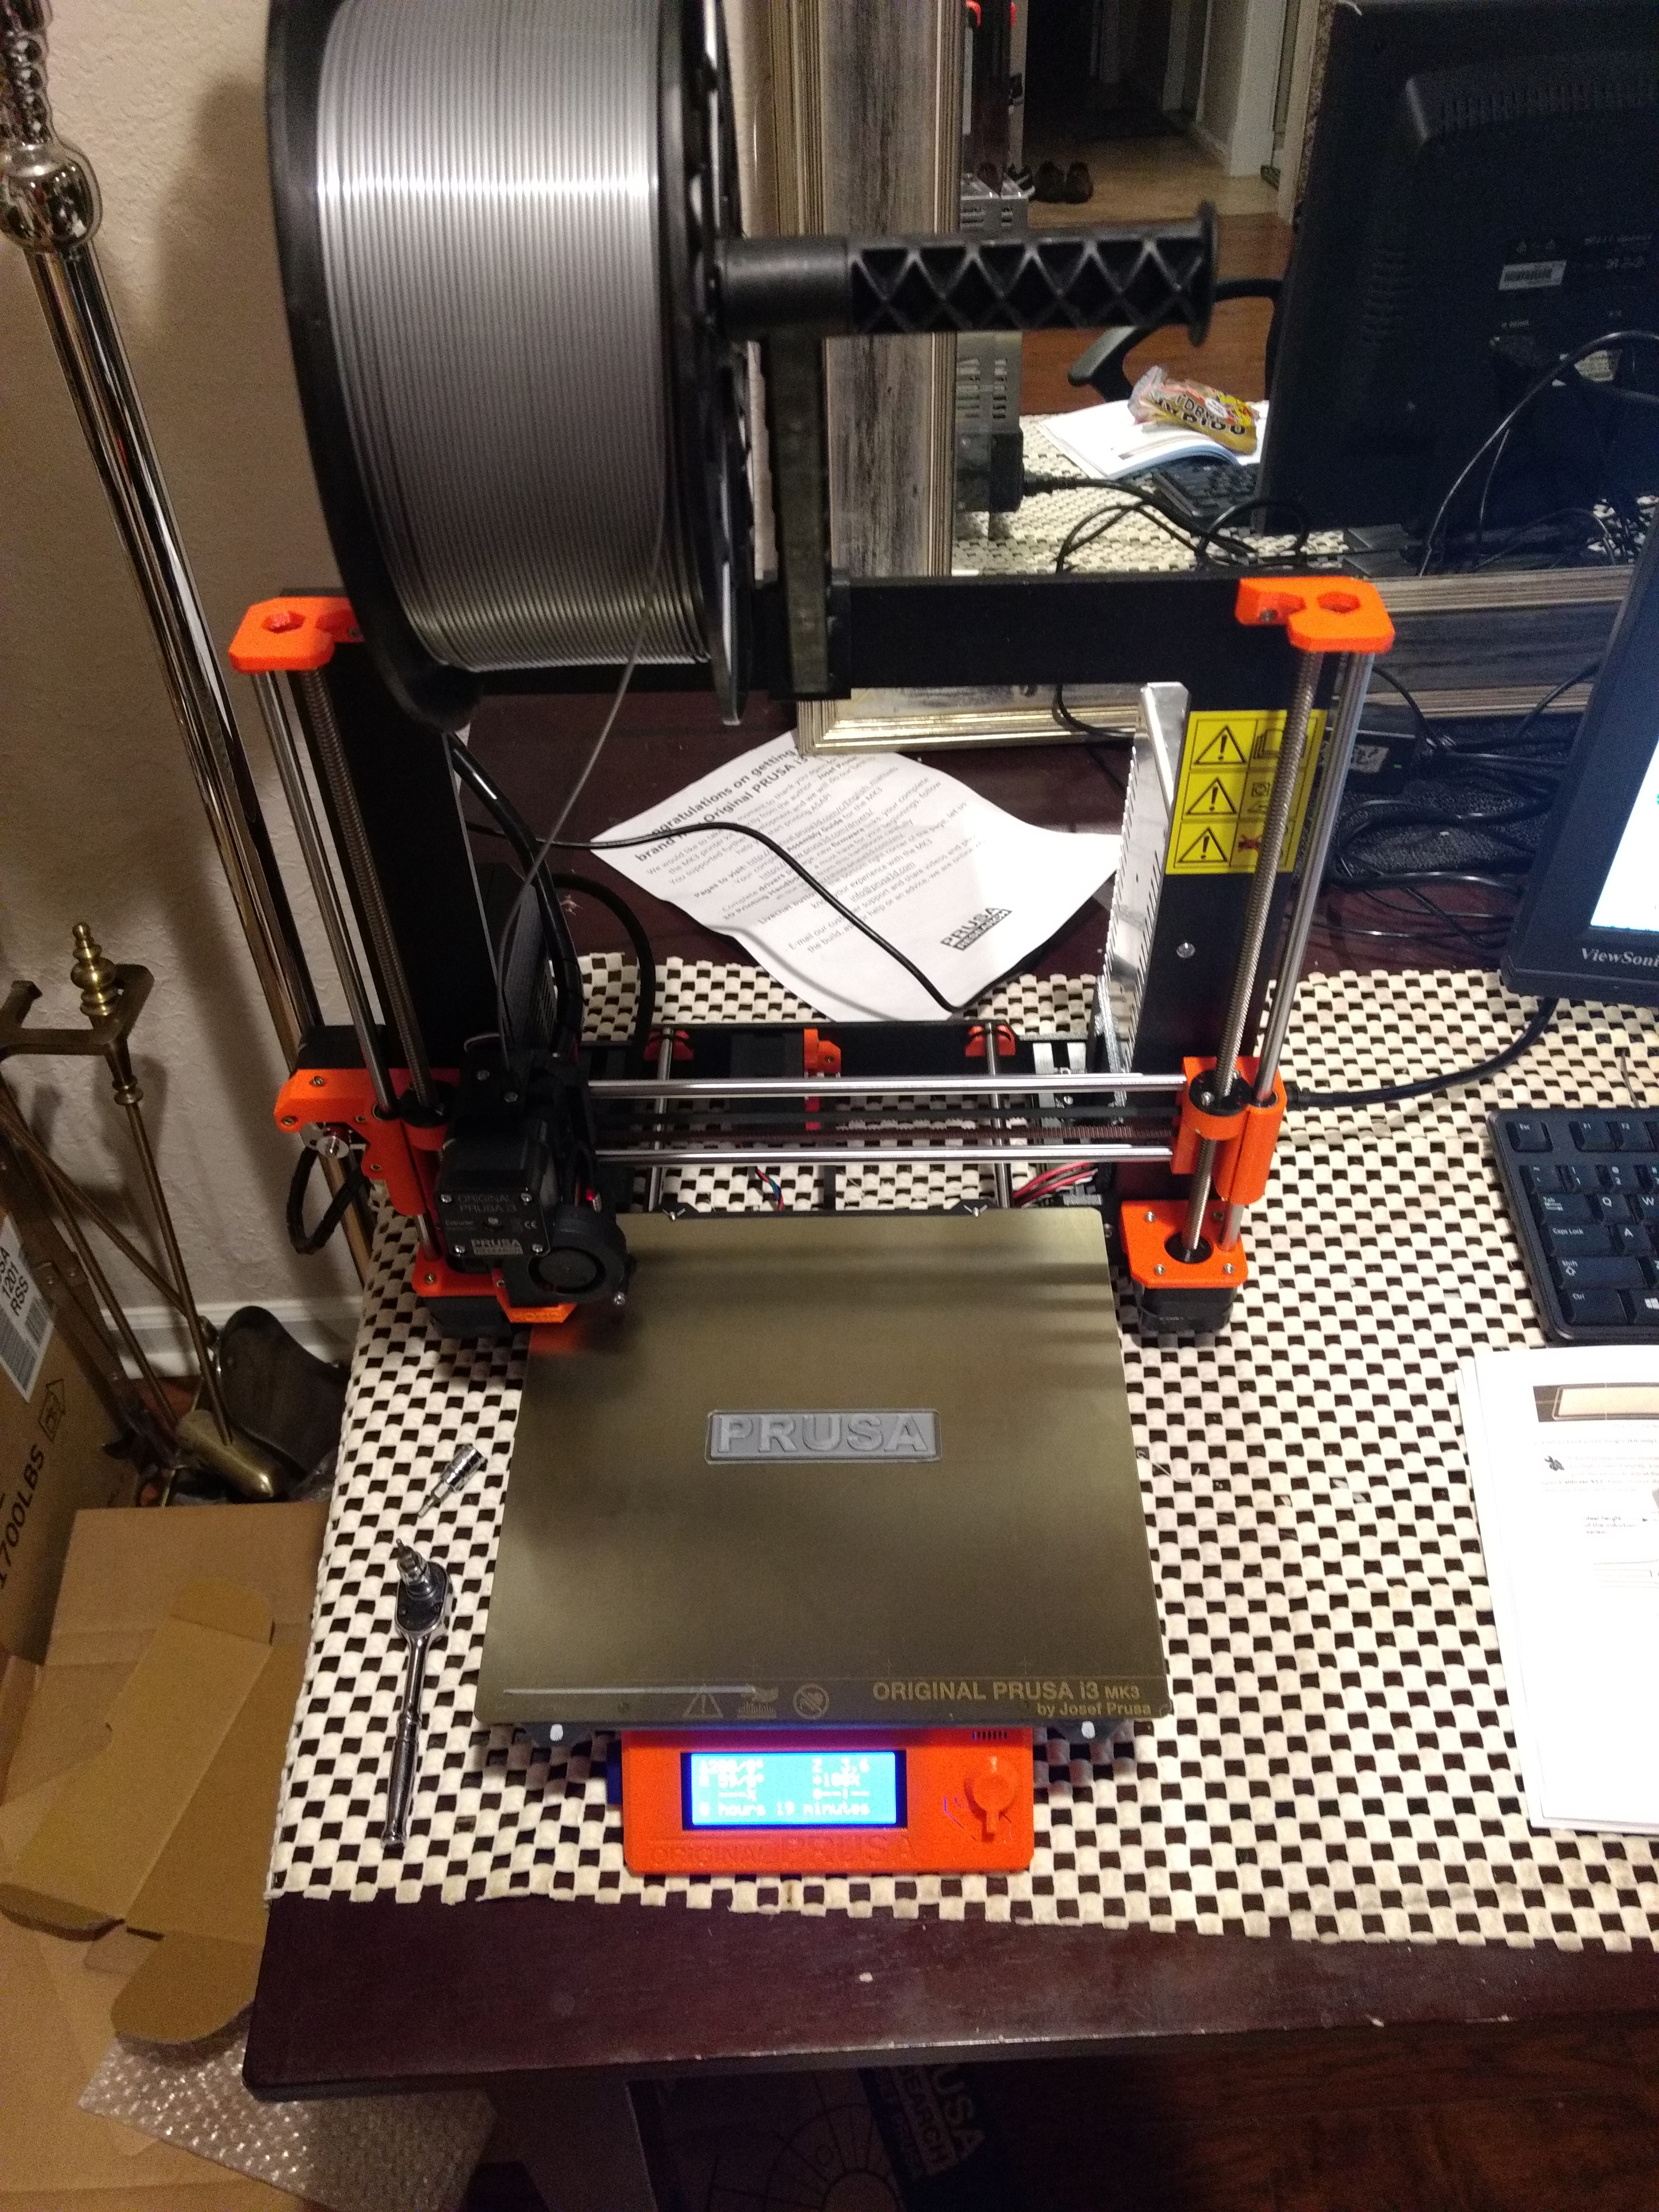
Assembled i3 mk3 (Own work. License: CC-BY-SA.)
Software
I use Slic3r Prusa edition to create gcode for the machine. The integration is very well done with the defaults for the printer being loaded in automatically. Default settings have been turning out quality prints. PrintRun(pronterface) had no issue connecting to the machine and running prints.
Printing
PLA
Printing parts in pla on the default 0.2mm fast profile with 20% to 80% infill. First layer is consistently good without a brim or raft. Some features have had small issues on the first layer where there’s sharp corners or tight radii, but they rarely cause issues with the overall print. Prints pop off the PEI sheet easily and if you have trouble the entire sheet can be removed and bent.
PETG
The first spool of prints went well with default 0.2mm fast profile and 20 to 50% infill. Consistently good first layer without adjusting live z from PLA setting. Bed adhesion is good if bed is clean, dust or oil from your finger will mess up the first layer. Print will pop off with a bend of the sheet when cold. Stringing is there but easily pulled off. The next 2 spools have not printed well, but I narrowed that down to bad material.
Material since then has been printing fairly well assuming live z is set well and nozzle is clean.
Updates
The printed printer parts, software and firmware are all getting continuous updates from Prusa Research. This made me confident the machine will be well supported throughout its useful life. After a few months of ownership, it’s clear that the updates can often be beta quality with new features being disabled in the next up date, then reenabled a few updates later.
Smart Features
The filament sensor has been OK. It came disabled by default which was suprising and caused me to lose a print. It worked fine to autoload filament the few times I used it. Currently, it isn’t being recoginized by firmware. The crash detect feature has been a dissapointment as well. I have never had it recover from a crash without a layer shift of at least 0.6mm. Power panic has been tested once and failed to recover from a ~3 second power loss when the power strip was accidentally switched off. PINDA probe came with temperature compensation switched off. This means mesh bed leveling will not be correct if PINDA is hot(typically 35 C or higher). Go to Settings>Temp Cal to turn on. Then run temp calibration to set the temp compensation. You may want to manually set it using manual temp calibration since the automatic calibration isn’t very good.
Long Term Update
After a couple months with the printer, issues are starting to come up.
Bed
The steel sheet will develop bubbles underneath the PEI from prints. The bubbles have been deemed normal by Prusa Research and tend to come and go. They will not go away if you print the same part in the same spot meaning you can’t print the same parts without moving them around the bed. PEI is likely to get damaged over time if printing PETG. A well adhered print ripped off a piece of PEI after 3ish months.
Bed is now up to .25mm out of level with no mechanical adjustment available.
Power Supply
Power supply died after approximately 3 months with approximately 1 month inside enclosure. This was indicated by the input fuse blowing loudly.
PINDA
The bed leveling/ first layer issues I had were partially created due to faulty PINDA probe(outside of its lack of temperature compensation). After replacing the probe with a BLTOUCH, its clear the probe was defective and part the issues I was having.
Z Axis Sync
After getting my printer working again with the BLTOUCH, the Z axis is losing sync. I tracked the issue to a failed lead screw nut.
Verdict
Decent machine that can produce good prints until the hardware breaks down. This printer packs a lot of features in for the price but the company is not doing a good job of integrating new features and the hardware is unlikely to last. It’s clear Prusa Research relies heavily on feedback from the community to test products so you should avoid buying new models until community has had time to point out flaws and the company has time to reintegrate those changes.

